Email Server - Postfix, Dovecot and Roundcube
Contents
Contents
TL;DR
- Set up your own Linux mail server step by step: Postfix for sending (SMTP), Dovecot for reading over IMAP, and Roundcube for webmail, then wire it up so you can also send and receive through Gmail.
- Fair warning before you start: self-hosted email is hard to get delivered — most ISPs block port 25, and mail from a new IP lands in spam without the right DNS records.
- Configure each service’s config files (Maildir storage, SSL certs, SASL auth), forward ports 25, 993, and 587, and note the snippets use Dovecot 2.3 syntax with a 2.4 migration table included.
- Publish SPF, DKIM (OpenDKIM) and DMARC records plus reverse DNS, start DMARC in monitoring mode, and test sending to Gmail until all three say
PASS.
Introduction
This is a step-by-step guide to running your own mail server on Linux: Postfix for sending (SMTP), Dovecot for reading over IMAP, and Roundcube for webmail, then wiring it all up so you can also send and receive through Gmail. It’s aimed at self-hosters who are comfortable on the command line.
Before you start: self-hosted email is hard to get delivered. Most residential ISPs block outbound port 25, and mail from a new IP without SPF, DKIM and DMARC records (plus a clean reverse DNS) usually lands in spam or is rejected outright. The server setup comes first; the SPF, DKIM and DMARC section then covers the DNS records you need before relying on it for real mail.
Postfix
Installation
sudo apt update -y && sudo apt install postfix -y
On the first screen, press Ok.
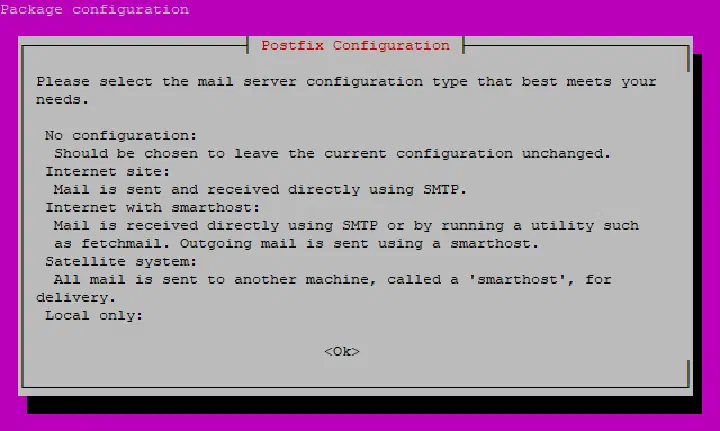
- No configuration: Config files will be blank.
- Internet site: Choose this if you have a domain.
- Internet with smarthost: Emails are received on this server, but emails are sent from another server.
- Satellite System: Postfix acts as a relay to another server.
- Local only: Will only be working for LAN users.
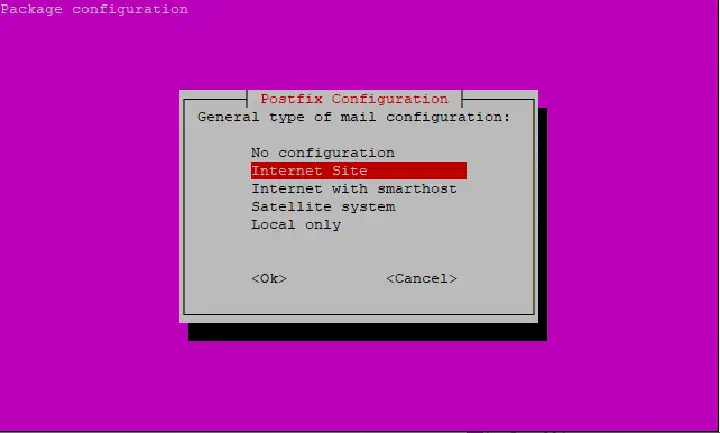
If you chose Internet Site, enter your domain here.
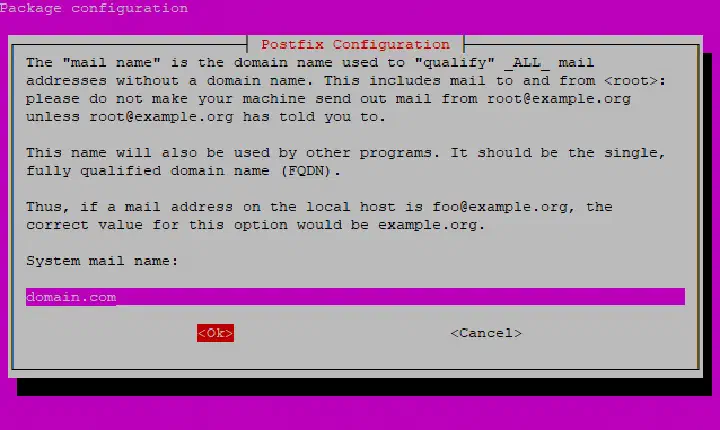
Configuration
We’ll need to modify some files as root, so you can use the next command to edit these files:
sudo nano /directory/file.ext
If you don’t have SSL certificates (made on your own with OpenSSL or with the help of Let’s Encrypt), you can follow this little explanation I made on the Apache server, on how to get the certificates.
It’s very easy, literally, it just borrows 3 minutes of your time.
File /etc/postfix/main.cf:
This is the main config file, here we can configure the use of SSL, SASL, and basic settings. Add these lines if you don’t have them, and modify them based on your needs.
In the home_mailbox I’ve chosen to use Maildir instead of Mailbox. Maildir allows saving each email as a single file, while Mailbox saves all of the emails in a single file. In general, Mailbox is worse for efficiency and performance because searching for an email in a file (locating the pointer in the file, removing each line that corresponds with the email and the saving) do a lot of I/O operations, while Maildir only creates/appends/deletes a file.
myorigin = /etc/mailname
mydomain = mydomain.com
myhostname = mydomain.com
smtp_tls_security_level = may
smtpd_tls_cert_file = /etc/letsencrypt/live/mydomain.com/fullchain.pem
smtpd_tls_key_file = /etc/letsencrypt/live/mydomain.com/privkey.pem
smtpd_tls_security_level = may
smtpd_tls_auth_only = yes
smtpd_sasl_auth_enable = yes
smtpd_sasl_type = dovecot
smtpd_sasl_path = private/auth
home_mailbox = Maildir/
Since myhostname is mydomain.com, Postfix’s default mydestination already treats mail for user@mydomain.com as local and delivers it to the local user user, so no extra address map is needed. (If you use a different myhostname, add mydomain.com to mydestination.)
To let clients such as Gmail send mail through the server (submission on port 587), we have to enable the submission service in the following file. This is the stock block from Debian’s master.cf, uncommented and trimmed:
File /etc/postfix/master.cf:
smtp      inet  n       -       y       -       -       smtpd
#smtp      inet  n       -       y       -       1       postscreen
#smtpd     pass  -       -       y       -       -       smtpd
#dnsblog   unix  -       -       y       -       0       dnsblog
#tlsproxy  unix  -       -       y       -       0       tlsproxy
submission inet n       -       y       -       -       smtpd
  -o syslog_name=postfix/submission
  -o smtpd_tls_security_level=encrypt
  -o smtpd_tls_wrappermode=no
  -o smtpd_sasl_auth_enable=yes
  -o smtpd_relay_restrictions=permit_sasl_authenticated,reject
  -o smtpd_recipient_restrictions=permit_sasl_authenticated,reject
  -o smtpd_sasl_type=dovecot
  -o smtpd_sasl_path=private/auth
  -o smtpd_tls_auth_only=yes
  -o milter_macro_daemon_name=ORIGINATING
Dovecot
Installation
sudo apt install dovecot-imapd -y
Configuration
Dovecot version check: run
dovecot --version. The snippets below use 2.3 syntax (Debian 12, Ubuntu 24.04). Debian 13 ships 2.4, which isn’t backward-compatible: the config must start withdovecot_config_versionanddovecot_storage_version, and several settings were renamed:
Dovecot 2.3 Dovecot 2.4 mail_location = maildir:~/Maildirmail_driver = maildir+mail_path = ~/Maildirdisable_plaintext_auth = yesauth_allow_cleartext = no(now the default)ssl_cert/ssl_keyssl_server_cert_file/ssl_server_key_filessl_prefer_server_ciphersssl_server_prefer_cipherspassdb { driver = pam }passdb pam { }userdb { driver = passwd }userdb passwd { }The 2.3 to 2.4 upgrade guide has the full list.
We’ll need to modify some files as root, so you can use the next command to edit these files:
sudo nano /directory/file.ext
First we configure Dovecot so that the mails arrive to the user’s folder:
/etc/dovecot/conf.d/10-mail.conf file.
And we change the line:
mail_location = mbox:~/mail:INBOX=/var/mail/%u
By:
mail_location = maildir:~/Maildir
Caution (PAM and system accounts): this setup authenticates with PAM, so the IMAP/SMTP password is the Linux account password, and the server is exposed to the internet on 25, 587 and 993. Without rate limiting, anyone can brute-force it, and a leaked password is a shell password. Install and configure fail2ban first (see fail2ban), use a dedicated account with
nologinfor mail, and consider Dovecot virtual users instead. Forward only 993 and 587 (and 25 to receive); don’t expose plain 143.
Next thing to do is enabling SSL and configure the Postfix section:
/etc/dovecot/conf.d/10-master.conf file.
We uncomment the following:
inet_listener imap {
    port = 143
  }

inet_listener imaps {
    port = 993
    ssl = yes
  }
Port 143 is the standard IMAP port (clients upgrade it to TLS with STARTTLS), but it’s better to use implicit TLS on port 993.
Outgoing mail on port 587 is handled by Postfix’s submission service (see master.cf above), not by Dovecot. Postfix delivers to the Maildir itself (home_mailbox), so no LMTP listener is needed.
And change the Postfix section, the default is this:
# Postfix smtp-auth
#unix_listener /var/spool/postfix/private/auth {
#  mode = 0666
#}
We change it for this:
# Postfix smtp-auth
  unix_listener /var/spool/postfix/private/auth {
    mode = 0660
    user = postfix
    group = postfix
  }
Now we will configure some authentication settings.
/etc/dovecot/conf.d/10-auth.conf file.
Uncomment the following line:
disable_plaintext_auth = yes
And we change the following line:
auth_mechanisms = plain
Adding the “login”:
auth_mechanisms = plain login
We must also check that SSL is enabled and points to the same Let’s Encrypt certificate as Postfix. Without ssl_cert/ssl_key, Dovecot serves Debian’s self-signed default certificate, which Gmail rejects.
/etc/dovecot/conf.d/10-ssl.conf file.
ssl = required
ssl_cert = </etc/letsencrypt/live/mydomain.com/fullchain.pem
ssl_key = </etc/letsencrypt/live/mydomain.com/privkey.pem
ssl_prefer_server_ciphers = yes
ssl_min_protocol = TLSv1.2
Finally, it remains to verify that the authentication method is PAM.
/etc/dovecot/conf.d/auth-system.conf.ext file.
And we check that in “passdb” it’s like this:
passdb {
  driver = pam
  # [session=yes] [setcred=yes] [failure_show_msg=yes] [max_requests=<n>]
  # [cache_key=<key>] [<service name>]
  #args = dovecot
  args = %s
}
And in “userdb” as follows:
userdb {
  # <doc/wiki/AuthDatabase.Passwd.txt>
  driver = passwd
  # [blocking=no]
  #args =

  # Override fields from passwd
  #override_fields = home=/home/%n/Mail/received
}
Roundcube
Installation
sudo apt install roundcube -y
Configuration
You’ll need Apache2 for Roundcube to work. Debian’s package already installs an Apache alias at /roundcube (/etc/roundcube/apache.conf), so you can reach the webmail at https://mydomain.com/roundcube without extra steps. If you prefer /webmail, change the Alias line in that file instead of adding a second path.
Then point Roundcube at Dovecot and Postfix in /etc/roundcube/config.inc.php, or login won’t reach your server:
$config['default_host'] = 'ssl://localhost';
$config['default_port'] = 993;
$config['smtp_server'] = 'tls://localhost';
$config['smtp_port'] = 587;
$config['smtp_user'] = '%u';
$config['smtp_pass'] = '%p';
I haven’t re-tested these values on a current Roundcube. With Let’s Encrypt, localhost won’t match the certificate name, so use mydomain.com as the host (or relax imap_conn_options).
Port forwarding
To receive emails we’ll need to open a port for SMTP (port 25) in our router, redirecting every request to our server.
Once all of the above is configured, we will be able to send messages:
- From inside the system to other local users.
- To other users from other domains.
Thanks to mydestination, Postfix accepts mail for your domain, so we will be able to receive emails from outside the network.
Heads-up: most residential ISPs block port 25, usually outbound and often inbound too. If
nc -vz gmail-smtp-in.l.google.com 25times out from your server, that’s why. Your options are asking the ISP to unblock it (some do for business plans), running the server on a VPS that allows port 25, or sending through an SMTP relay with Postfix’srelayhost.
SPF, DKIM and DMARC
A working server isn’t enough: Gmail, Outlook and friends check three DNS records before trusting your mail. Without them, expect the spam folder or a flat rejection. Replace mydomain.com with your domain in everything below.
Reverse DNS (PTR)
Your server’s public IP should resolve back to your hostname (mydomain.com, matching myhostname in Postfix). You can’t set this in your own DNS zone: it’s set by whoever owns the IP, so look for “reverse DNS” in your VPS panel or ask your ISP. Check it with:
dig -x <your-public-ip> +short
SPF
SPF lists which servers may send mail for your domain. Add a TXT record on the domain itself:
mydomain.com. TXT "v=spf1 mx -all"
mx means “the servers in my MX record may send”, and -all means “reject everything else”. While testing, use ~all (soft fail) instead, since a forgotten relay would otherwise get legitimate mail rejected; switch to -all once everything passes. If you send through a relay, add it too (your provider documents the exact include:).
DKIM with OpenDKIM
OpenDKIM is effectively unmaintained upstream (the last stable release, 2.10.3, is from 2015), though it is still packaged and works. Rspamd is the maintained alternative that also signs DKIM.
DKIM signs every outgoing message with a private key; receivers verify it with a public key you publish in DNS. Install OpenDKIM and generate a key pair with the selector mail:
sudo apt install opendkim opendkim-tools -y
sudo mkdir -p /etc/opendkim/keys/mydomain.com
sudo opendkim-genkey -b 2048 -s mail -d mydomain.com -D /etc/opendkim/keys/mydomain.com
sudo chown -R opendkim:opendkim /etc/opendkim/keys
That creates mail.private (keep it secret, never commit it) and mail.txt (the DNS record).
File /etc/opendkim.conf, set or add:
Domain    mydomain.com
Selector  mail
KeyFile   /etc/opendkim/keys/mydomain.com/mail.private
Socket    inet:8891@localhost
A TCP socket on localhost avoids fighting Postfix’s chroot over a Unix socket path.
File /etc/postfix/main.cf, append:
milter_default_action = accept
milter_protocol = 6
smtpd_milters = inet:localhost:8891
non_smtpd_milters = $smtpd_milters
Restart both:
sudo systemctl restart opendkim postfix
Now publish the public key. cat /etc/opendkim/keys/mydomain.com/mail.txt prints it split over several quoted strings; join them into one value for a TXT record named mail._domainkey:
mail._domainkey.mydomain.com. TXT "v=DKIM1; k=rsa; p=<public key from mail.txt>"
Once DNS has propagated, check that the published key matches the private one:
sudo opendkim-testkey -d mydomain.com -s mail -vvv
key OK is what you want. (key not secure just means your zone doesn’t use DNSSEC; it’s fine.)
DMARC
DMARC tells receivers what to do when SPF or DKIM fail, and where to send reports. Start in monitoring mode:
_dmarc.mydomain.com. TXT "v=DMARC1; p=none; rua=mailto:postmaster@mydomain.com"
Read the reports for a couple of weeks. Once your legitimate mail passes, tighten it to p=quarantine, then p=reject.
Test it
Send a message to a Gmail address, open it, and choose Show original: SPF, DKIM and DMARC should all say PASS. For a more detailed score, send one to the address that mail-tester.com gives you.
Send emails with Gmail via IMAP
Note (2026): Google’s help page for adding other accounts now warns that it is “making changes to Gmailify and POP support”, so the “Add account” flow and the screenshots below may no longer match what you see. I haven’t re-tested it.
To use our email server with Gmail we’ll need to open another two ports, one for fetching the emails and another to send emails from Gmail, called the submission port.
We can do it with POP3 too, but the whole installation we have been configuring for IMAP. To use POP3, you just need to modify the Dovecot file /etc/dovecot/conf.d/10-master.conf and allowing POP3 and POP3s (in case you want to use SSL).
- Without SSL (not recommended): Open ports 143 (IMAP) and 587 (submission) in your router.
- With SSL: Open ports 993 (IMAPs) and 587 (submission) in your router.
Then follow these steps:
- Click on the drop-down and search the “Settings” button.

- Click on “Add account”.

- Select “Another service”.

- Write your email ("myuser@mydomain.com").

- Select IMAP.

- Write the system user’s password. This hands your Linux account password to a third party, which is one more reason to use a dedicated mail account.

- Check settings are right for IMAP.

- Config some miscellaneous settings.
- Done!

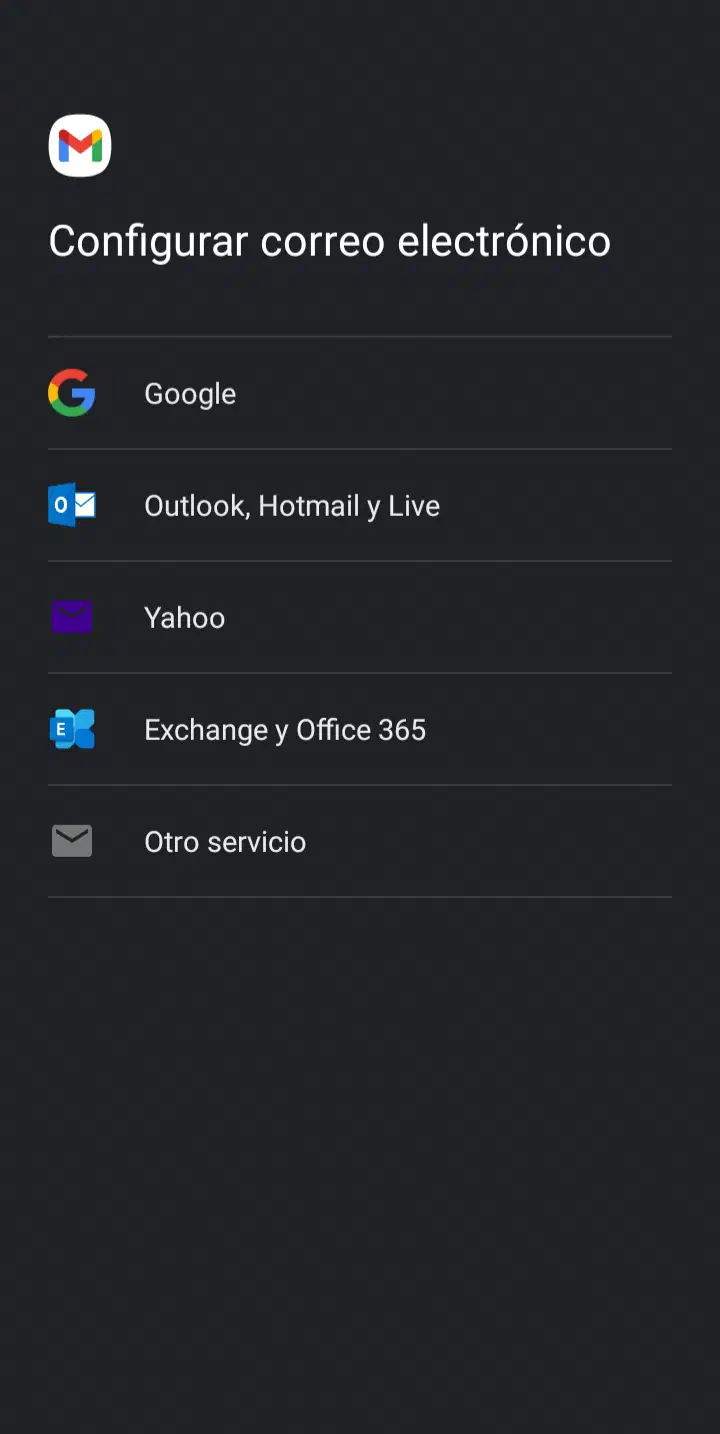
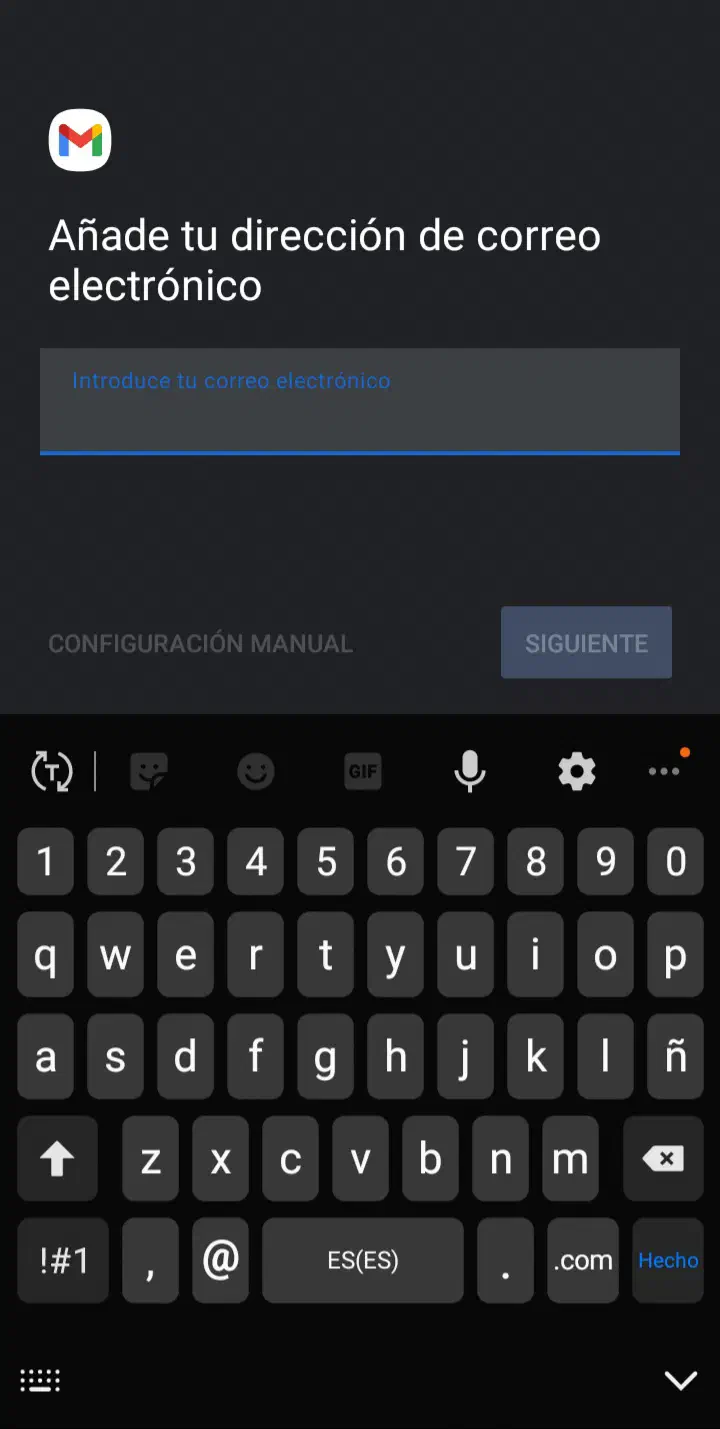

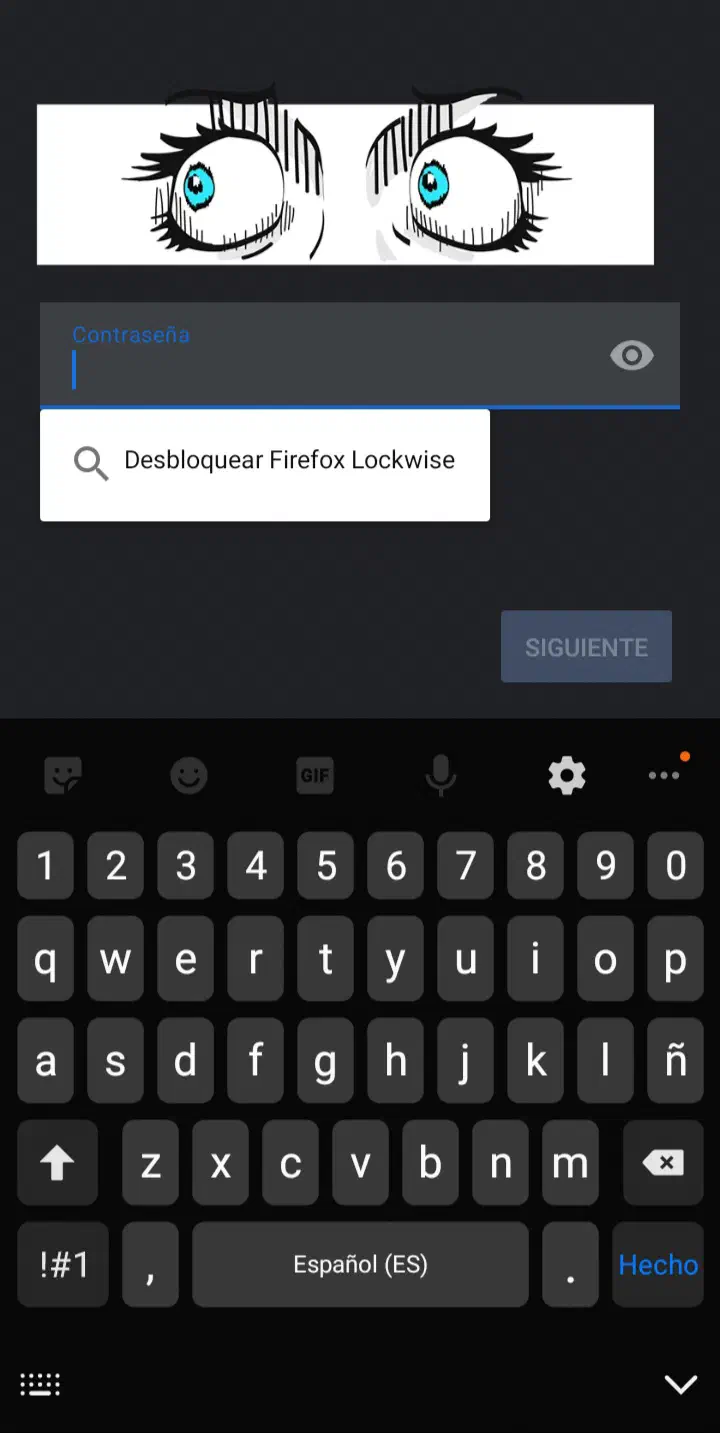
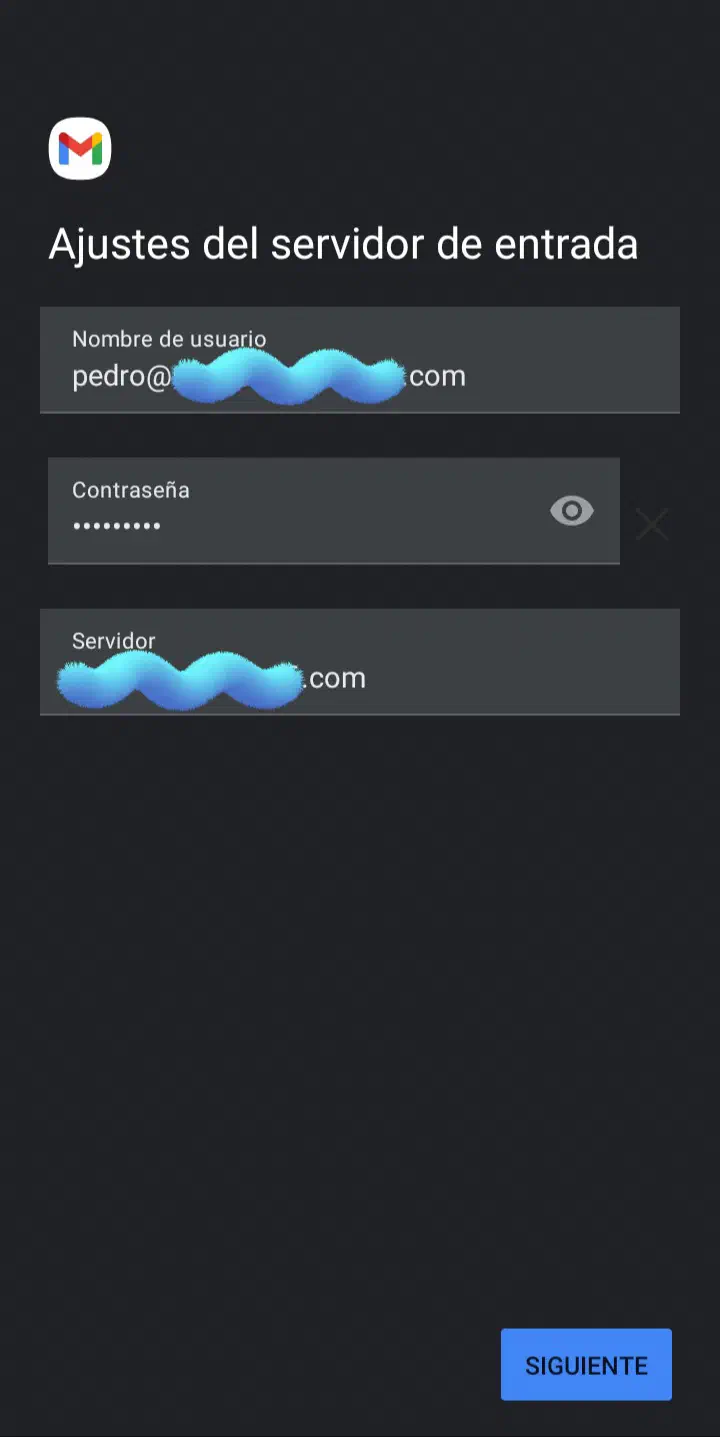
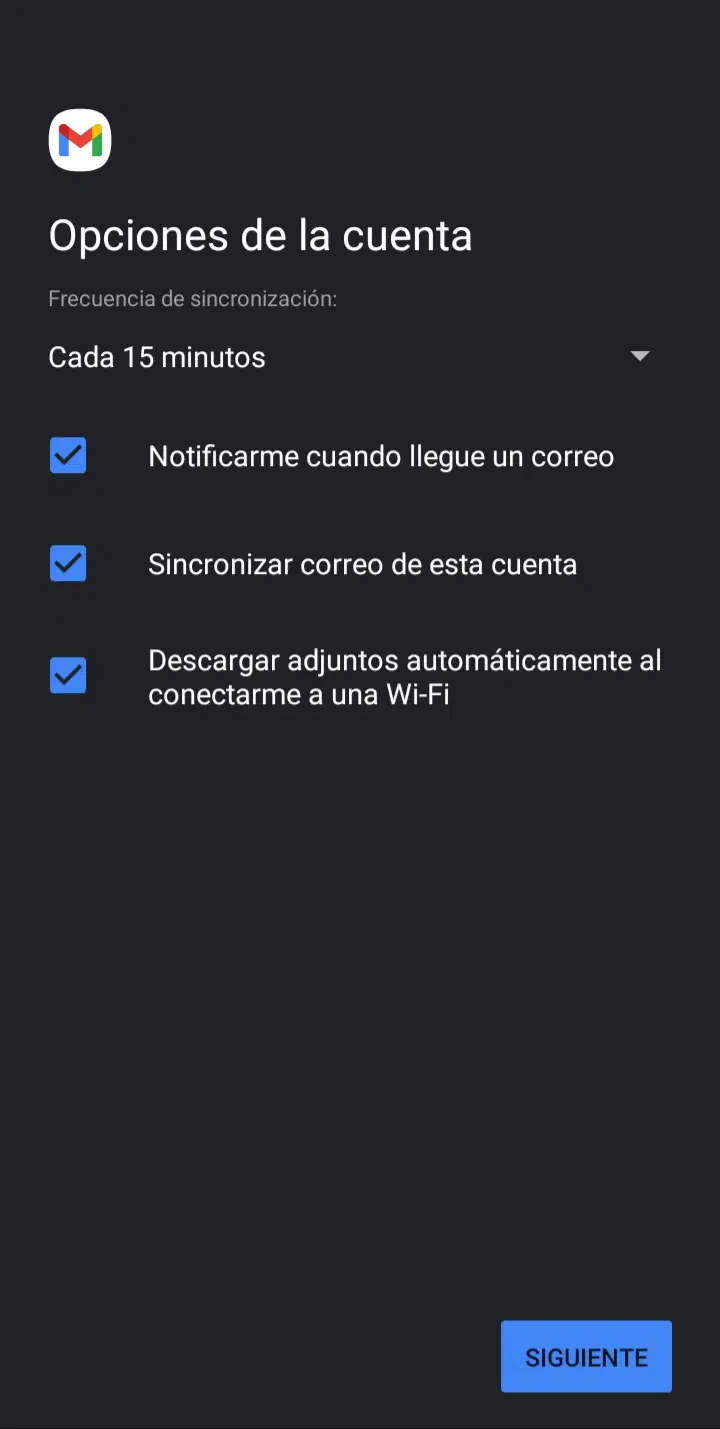
Sometimes these screens don’t appear in the same order, it may ask for some security settings like using STARTTLS (without SSL) or SSL, selecting one or another will modify the port to use.
If you followed the steps in every config file of the different services, you shouldn’t encounter any problem with this. But if that’s the case, feel free to contact me!