WireGuard Setup
Contents
Contents
TL;DR
- Set up a WireGuard VPN the easy way using the wg-easy Docker image, with no hand-editing of config files.
- Run the container, forward one UDP port on your router, and keep the web admin panel off the internet. Reach it from your LAN or over an SSH tunnel.
- Create clients from the admin panel, then connect on Windows or Linux with the downloaded config file.
- On Android or iOS, install the WireGuard app and add the server by scanning the QR code from the panel.
- Changing the public port from 51820 is cosmetic, not a security measure. WireGuard doesn’t answer unauthenticated packets.
Updated (October 2026): I wrote this in 2022. The project has moved to
wg-easy/wg-easyand the image toghcr.io/wg-easy/wg-easy. Version 15 is a rewrite: theWG_HOST,PASSWORDandWG_PORTenvironment variables are gone, and you set the host, port and admin account in a first-run web wizard. The server section below is rewritten for v15 (checked against the upstream docs in October 2026, not re-run end to end). The client section is unchanged. If you still run v14 or older, see the v14 to v15 migration guide.
Introduction
WireGuard is a fast, modern VPN that’s refreshingly simple to run. By the end of this guide you’ll have a server up the easy way, using wg-easy in Docker, and clients connected on Windows, Linux, Android and iOS. It’s aimed at anyone who wants secure remote access to their home network or a personal server without hand-editing config files.
WireGuard Server Setup
The easiest way to set up a WireGuard server is the wg-easy Docker image, created by Emile Nijssen.
You need Docker installed. Use the official install guide. The convenience script is the quick way:
curl -sSL https://get.docker.com | sh
sudo usermod -aG docker "$(whoami)"
Caution: piping a script into
shruns whatever the server sends you, so read it first if you can. Adding yourself to thedockergroup is root-equivalent: anyone in that group can mount the whole filesystem into a container. Log out and back in for the group change to apply.
This tutorial uses the following diagram:
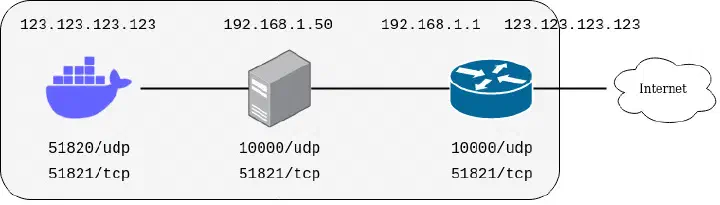
Our WAN IP is 123.123.123.123, our router LAN IP is 192.168.1.1 and our server IP is 192.168.1.50. Clients will connect to UDP port 10000 on the WAN IP.
Using a port other than 51820 is cosmetic. WireGuard doesn’t reply to packets that don’t carry a valid key, so scanners see nothing on either port. I use 10000 here only to show that the router port and the container port must agree. Keep 51820 if you prefer.
Create a compose.yaml (this follows the upstream example, minus its IPv6 network):
services:
  wg-easy:
    image: ghcr.io/wg-easy/wg-easy:15
    container_name: wg-easy
    environment:
      - INSECURE=true  # the panel is plain HTTP, see the warning below
    volumes:
      - ./wg-easy:/etc/wireguard
      - /lib/modules:/lib/modules:ro
    ports:
      - "10000:10000/udp"           # must match the port you set in the wizard
      - "127.0.0.1:51821:51821/tcp" # admin panel, this machine only
    restart: unless-stopped
    cap_add:
      - NET_ADMIN
      - SYS_MODULE
    sysctls:
      - net.ipv4.ip_forward=1
      - net.ipv4.conf.all.src_valid_mark=1
Start it:
docker compose up -d
:15 is the upstream tag for the latest 15.x release, so you get patches without a surprise major upgrade. In v15 the port you enter in the wizard is both the port WireGuard listens on inside the container and the port written into client configs, so the container port in the mapping above has to match it.
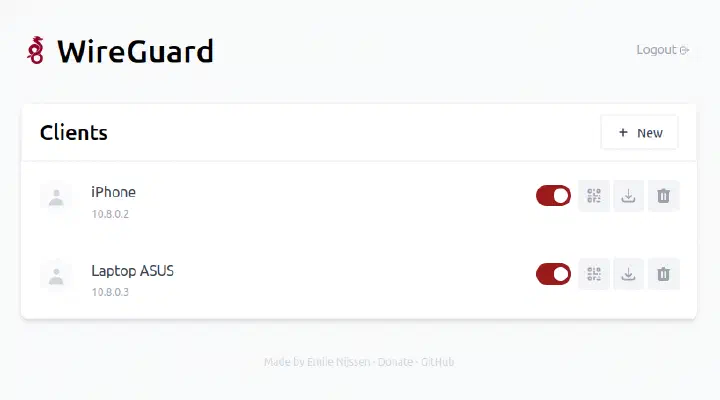
Open the admin panel on the server at http://localhost:51821/. The first visit shows the setup wizard. Create the admin account, then set the host to 123.123.123.123 and the port to 10000.
Caution: the host should be a name or IP that stays valid. Residential IPs change, so use a dynamic DNS name such as DuckDNS (the Jellyfin post does this). If your ISP puts you behind CGNAT, port forwarding won’t work at all and you need a VPS or a tunnel instead.
Router port forwarding
Forward only the VPN port:
- HOST: 192.168.1.50. EXTERNAL PORT: 10000. INTERNAL PORT: 10000. PROTOCOL: UDP
Don’t forward 51821. The admin panel is plain HTTP behind a single password, which is why INSECURE=true is needed at all, and it can create VPN access for anyone who gets in. Reach it from the server itself, or through an SSH tunnel from another machine (replace the address with the server’s LAN IP, or a WAN address if you already expose SSH):
ssh -L 51821:localhost:51821 user@192.168.1.50
Then browse to http://localhost:51821/ on your own machine. To open the panel to your whole LAN instead, drop the 127.0.0.1: prefix from the port mapping and keep the router rule off.
WireGuard Client Setup
First, login to the admin panel.
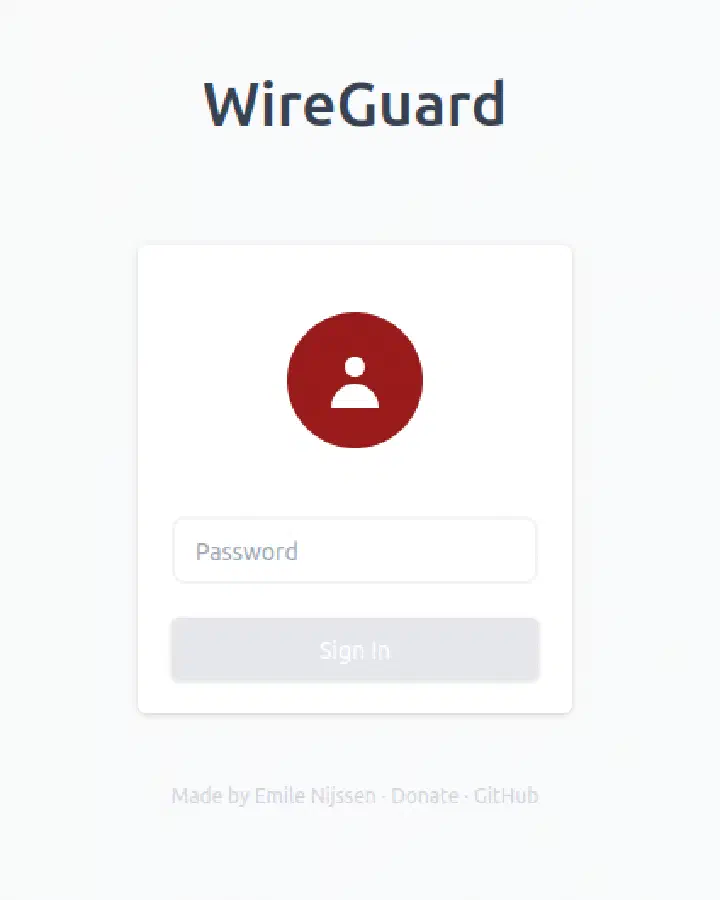
Then, create a client on the web app and give it a name.
PC
Go to the WireGuard web and download the installer for your operating system.
Windows
Once you have installed the Windows WireGuard client, you should download the config file from the server.
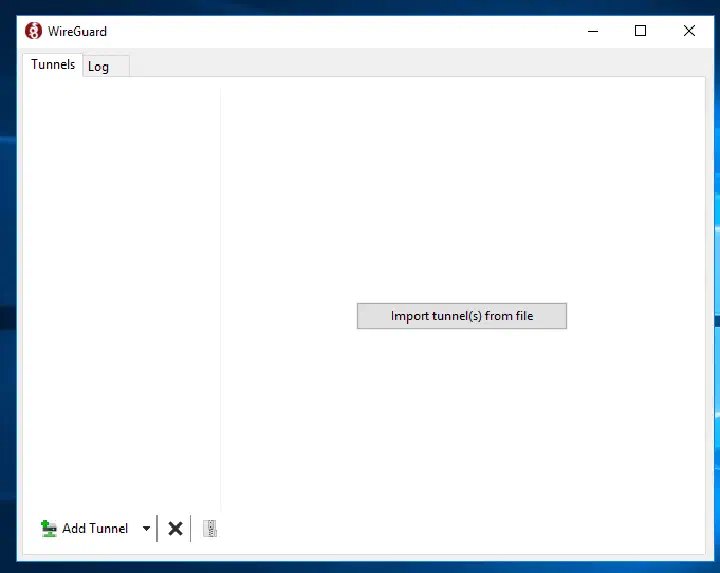
Click on “Import Tunnel(s) from file” and select the config file.
Voilà, you have a Windows WireGuard client.
Linux
In order to connect to the WireGuard server, first you need to install the WireGuard client.
sudo apt-get install wireguard wireguard-tools resolvconf
Then, download the configuration from the server and save it in the WireGuard configuration folder:
sudo cp ~/Downloads/<client-name>.conf /etc/wireguard/wg0.conf
The config holds the client’s private key, so lock it down:
sudo chmod 600 /etc/wireguard/wg0.conf
Then, enable WireGuard to start at boot:
sudo systemctl enable wg-quick@wg0.service
sudo systemctl start wg-quick@wg0.service
Or just start it manually:
sudo wg-quick up wg0
Phone
Install the WireGuard app from the Play Store or the App Store.
Scan the QR by clicking the “+” icon on the top right, and then select “Create from QR” or if you downloaded the config file, select “Create from file”.
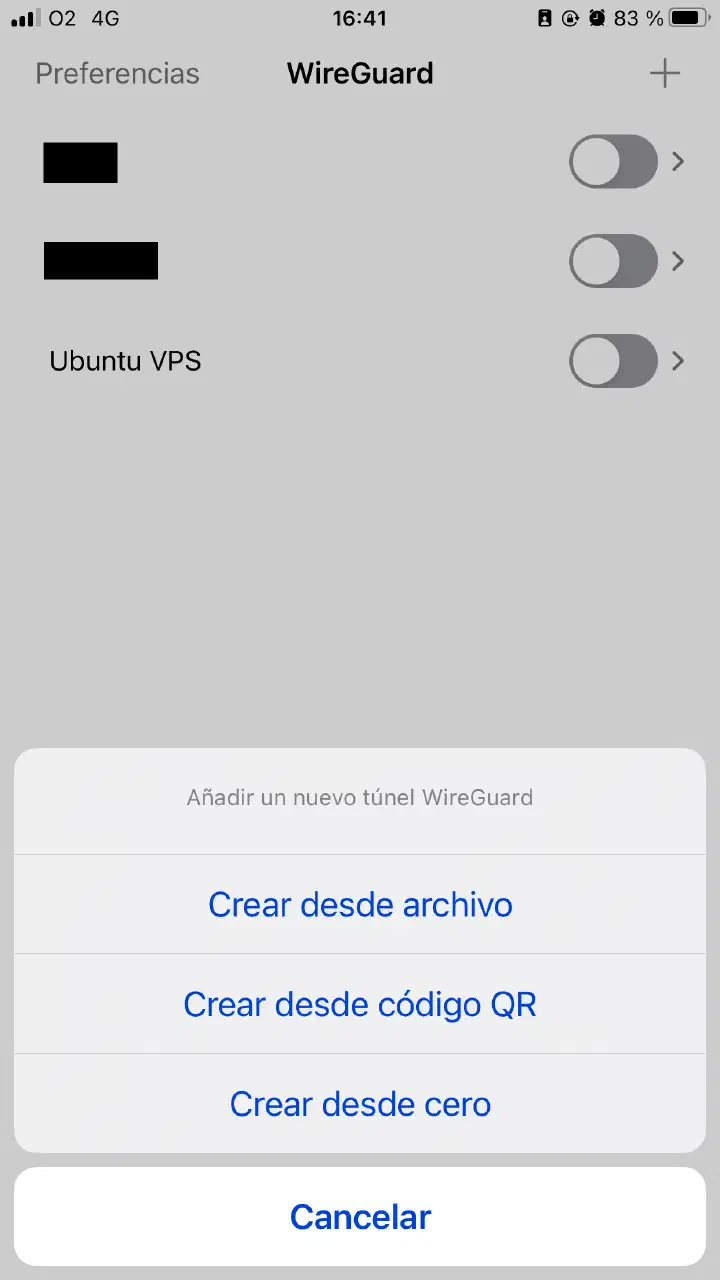
After scanning the QR it should automatically add the WireGuard server to the list.